-
JD Spinoza
JD Spinoza
JD enjoys teaching people how to use ZoomShift to save time spent on scheduling. He’s curious, likes learning new things everyday and playing the guitar (although it’s a work in progress).
- Feb 20, 2026
How To Make A Work Schedule in Excel (+ Free Template)

Key tips:
- Open Excel and start a blank spreadsheet.
- Enter your title along the top of the page and label the columns by weekdays.
- In row A, enter work time in increments of 30 minutes.
- Optional: Color code rows and save the schedule as a template.
Writing out a work schedule with pen and paper might seem simple, but it doesn’t always work in the modern work environment. Organizations that invest in digital scheduling and time-tracking software can decrease scheduling mistakes and off-the-clock work.
Plus, work schedules should be easy to edit, immediately shareable, and flexible. Learning how to make a work schedule in Excel can help fulfill these needs if work scheduling software is out of reach.
Whether you’re planning your own workday or organizing a team of employees, creating a work schedule in Excel is an easy and effective way to keep your work schedules on track.
Why make a work schedule in Excel?
While the most efficient option is to automate your work schedules is through an employee scheduling app like ZoomShift, Excel is a good alternative for keeping track of your employees’ working hours.
Excel allows you to make easy-to-use work schedules that you can quickly share with your team. They’re clean, concise, and can quickly be edited to make sure everyone has correct, updated information about their working hours.
Work scheduling might seem simple on the face of it, but not every company follows a 9 to 5 work schedule with weekends off. For many businesses, work schedules are complicated.
Waiters shouldn’t — and often can’t — cover for missing employees in a restaurant’s kitchen the same way executive assistants shouldn’t cover for missing sales reps in a business. Knowing how and who to schedule is crucial to the success of a business.
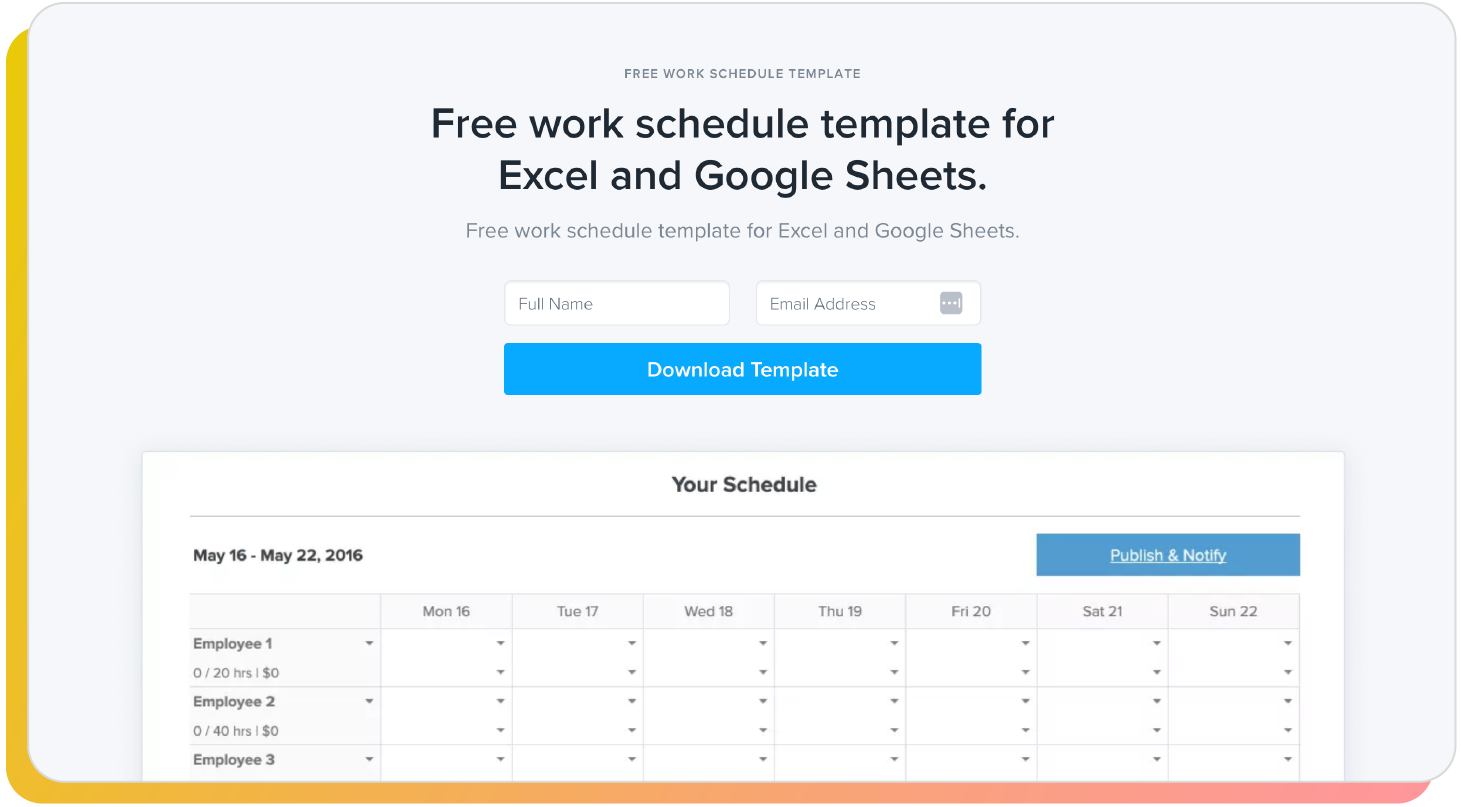
It’s even possible to download our free work schedule template to get started straight away.
How to create a work schedule in Excel
You don’t need high-level Excel skills to whip up a work schedule in Excel. In fact, any Excel user — from beginner to advanced — can quickly and easily create a usable, flexible work schedule.
Before creating a work schedule in Excel:
- Understand employee workloads: Project-based work plans with task management may need specialized work schedules.
- Evaluate available resources: If a business does not have the resource to bring a project to completion, work schedules may need to shift.
- Evenly distribute work: Work should be distributed evenly to employees based on position, expectations, and experience.
To create a work schedule in Excel, follow these 10 steps:
1. Open Excel and start a new blank spreadsheet.
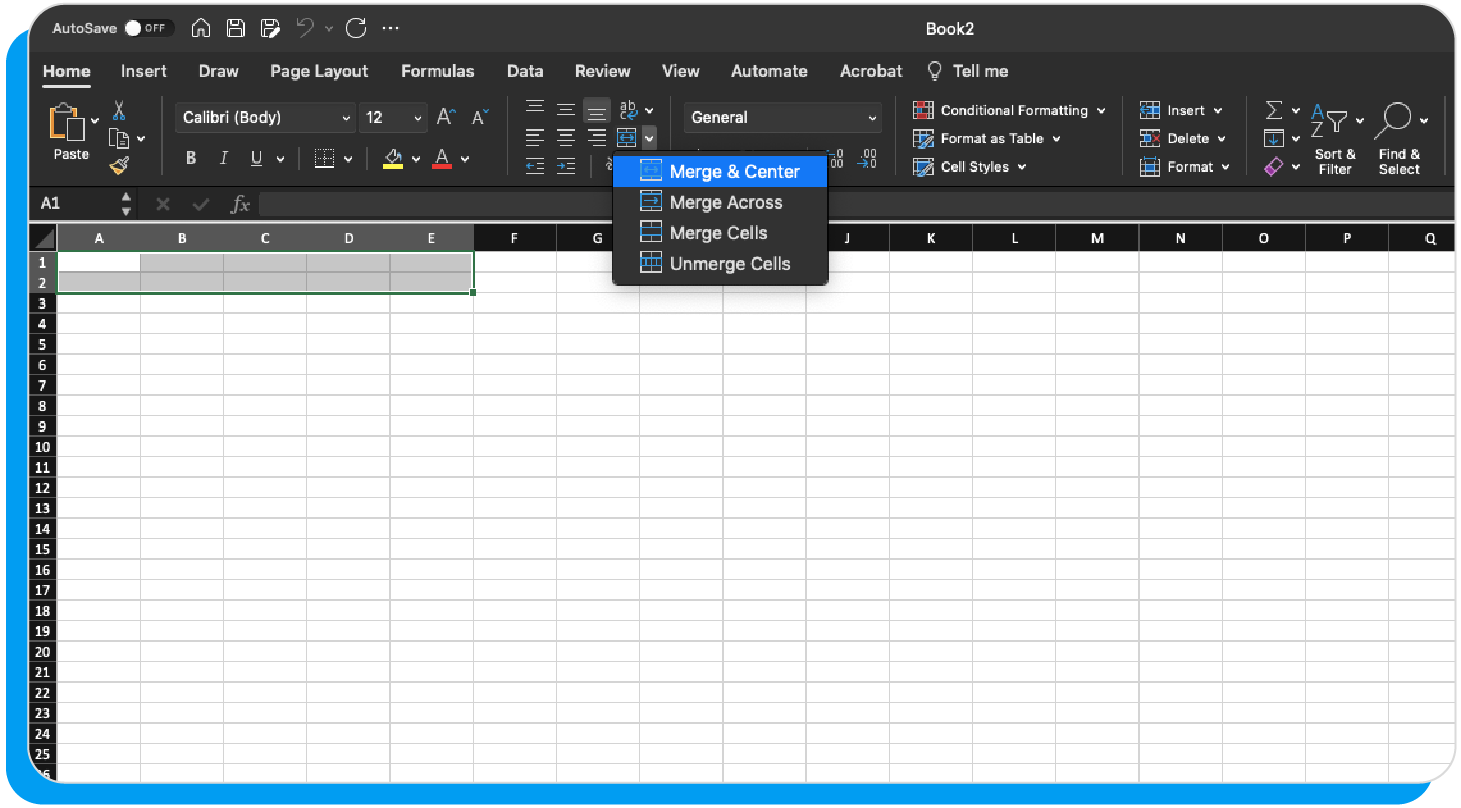
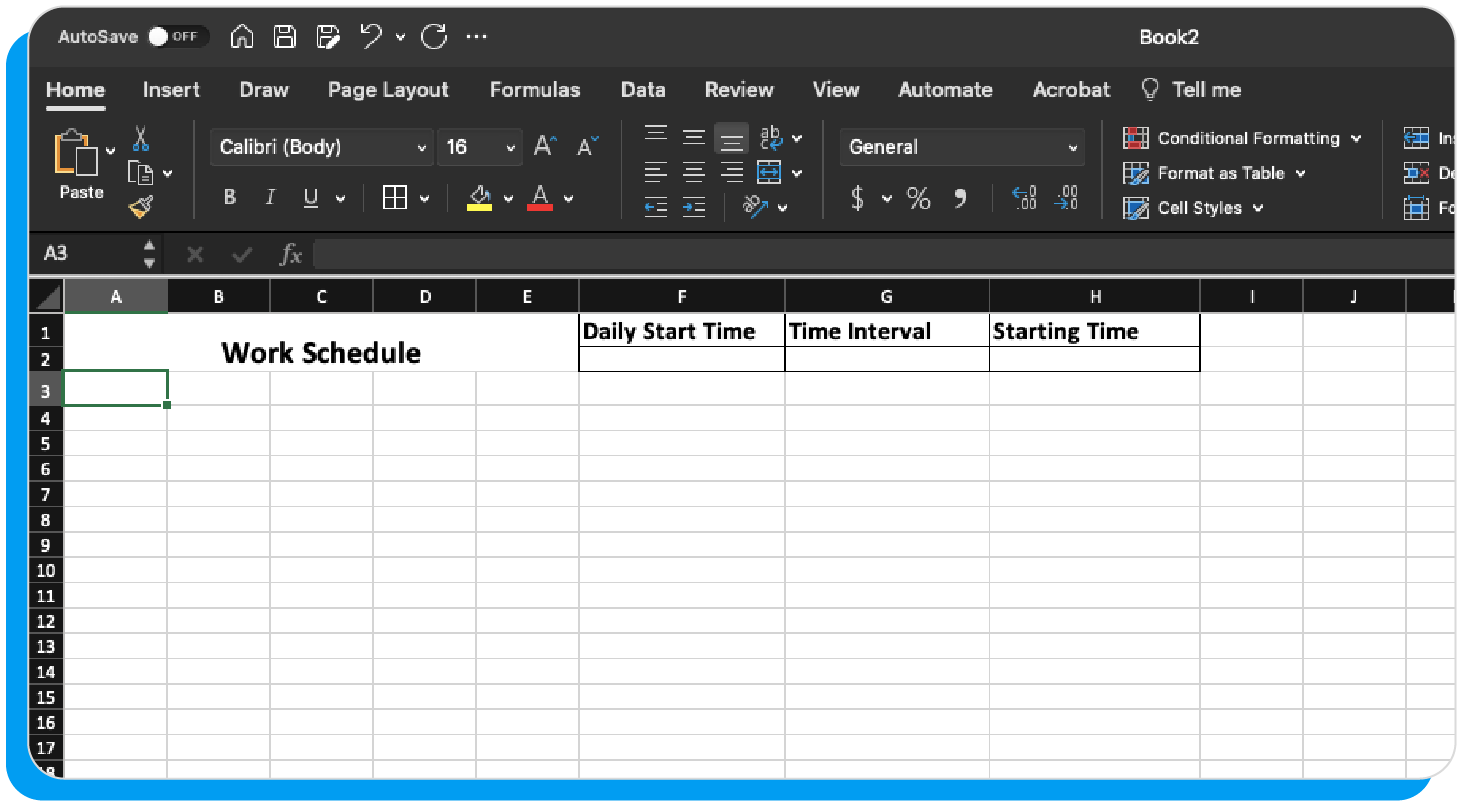
2. Highlight cells A1 to E2 and select “Merge and Center.” Enter your preferred schedule name in the merged cells.
3. Select cells F1 to H2. From the “Borders” dropdown, choose all borders.
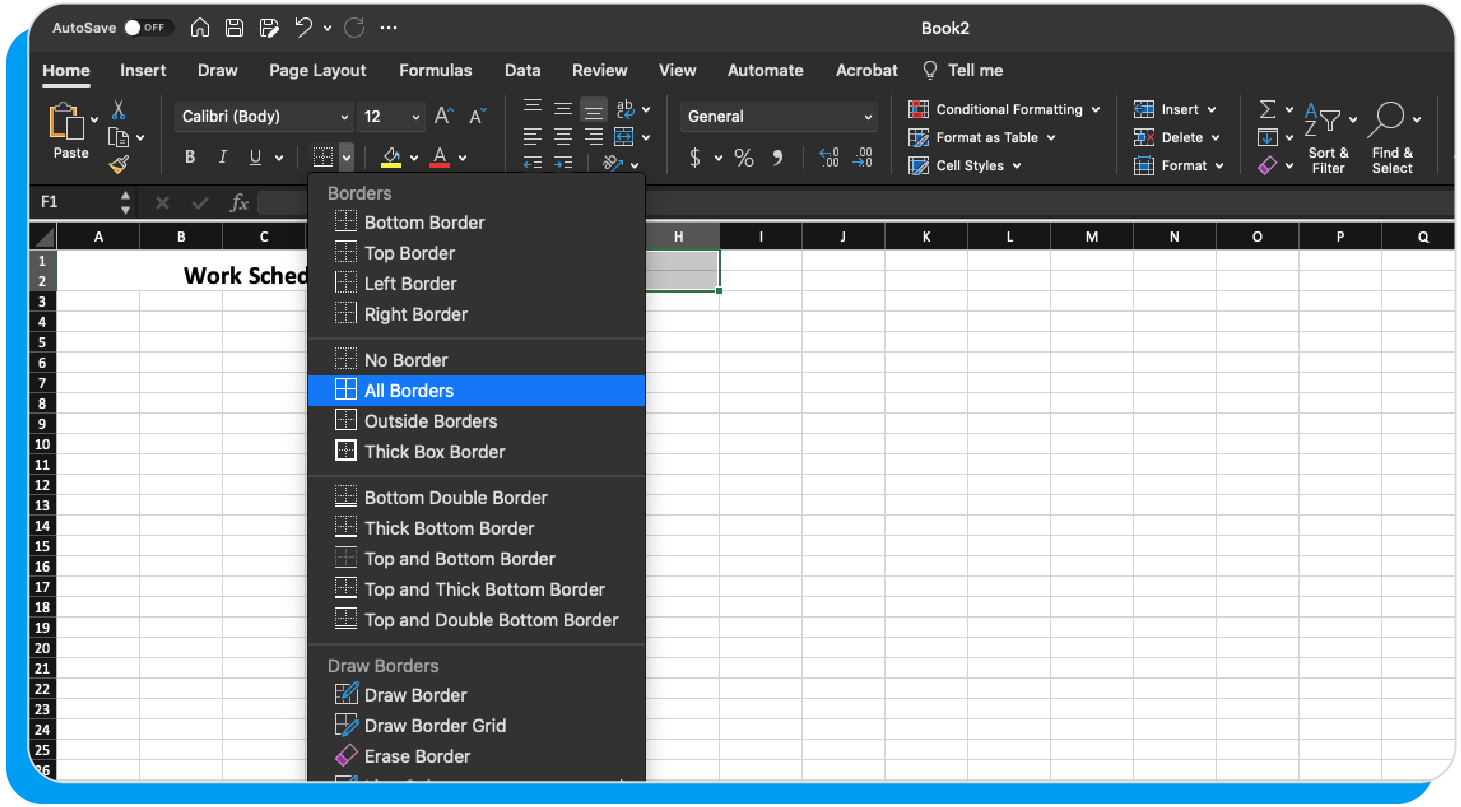
4. In these cells, enter the below key headers. After entering the headers, adjust the cells to fit the text.
- F1: Daily Start Time
- G1: Time Interval
- H1: Starting Date
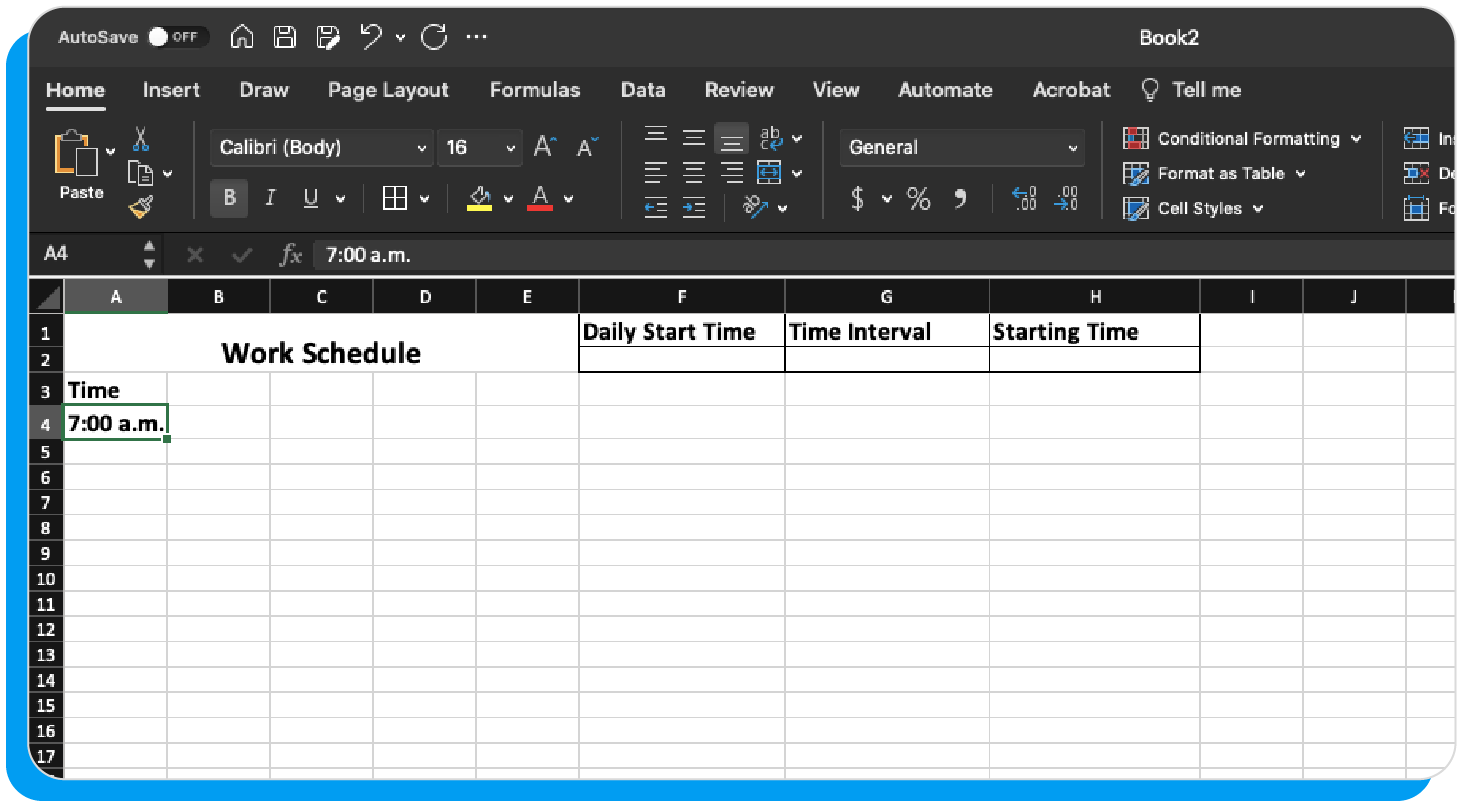
5. In cell A3, enter “time.”

6. In cell A4, enter the starting work time — for example, 7:00 a.m.
7. From cell A5 down, enter time in 30-minute increments.
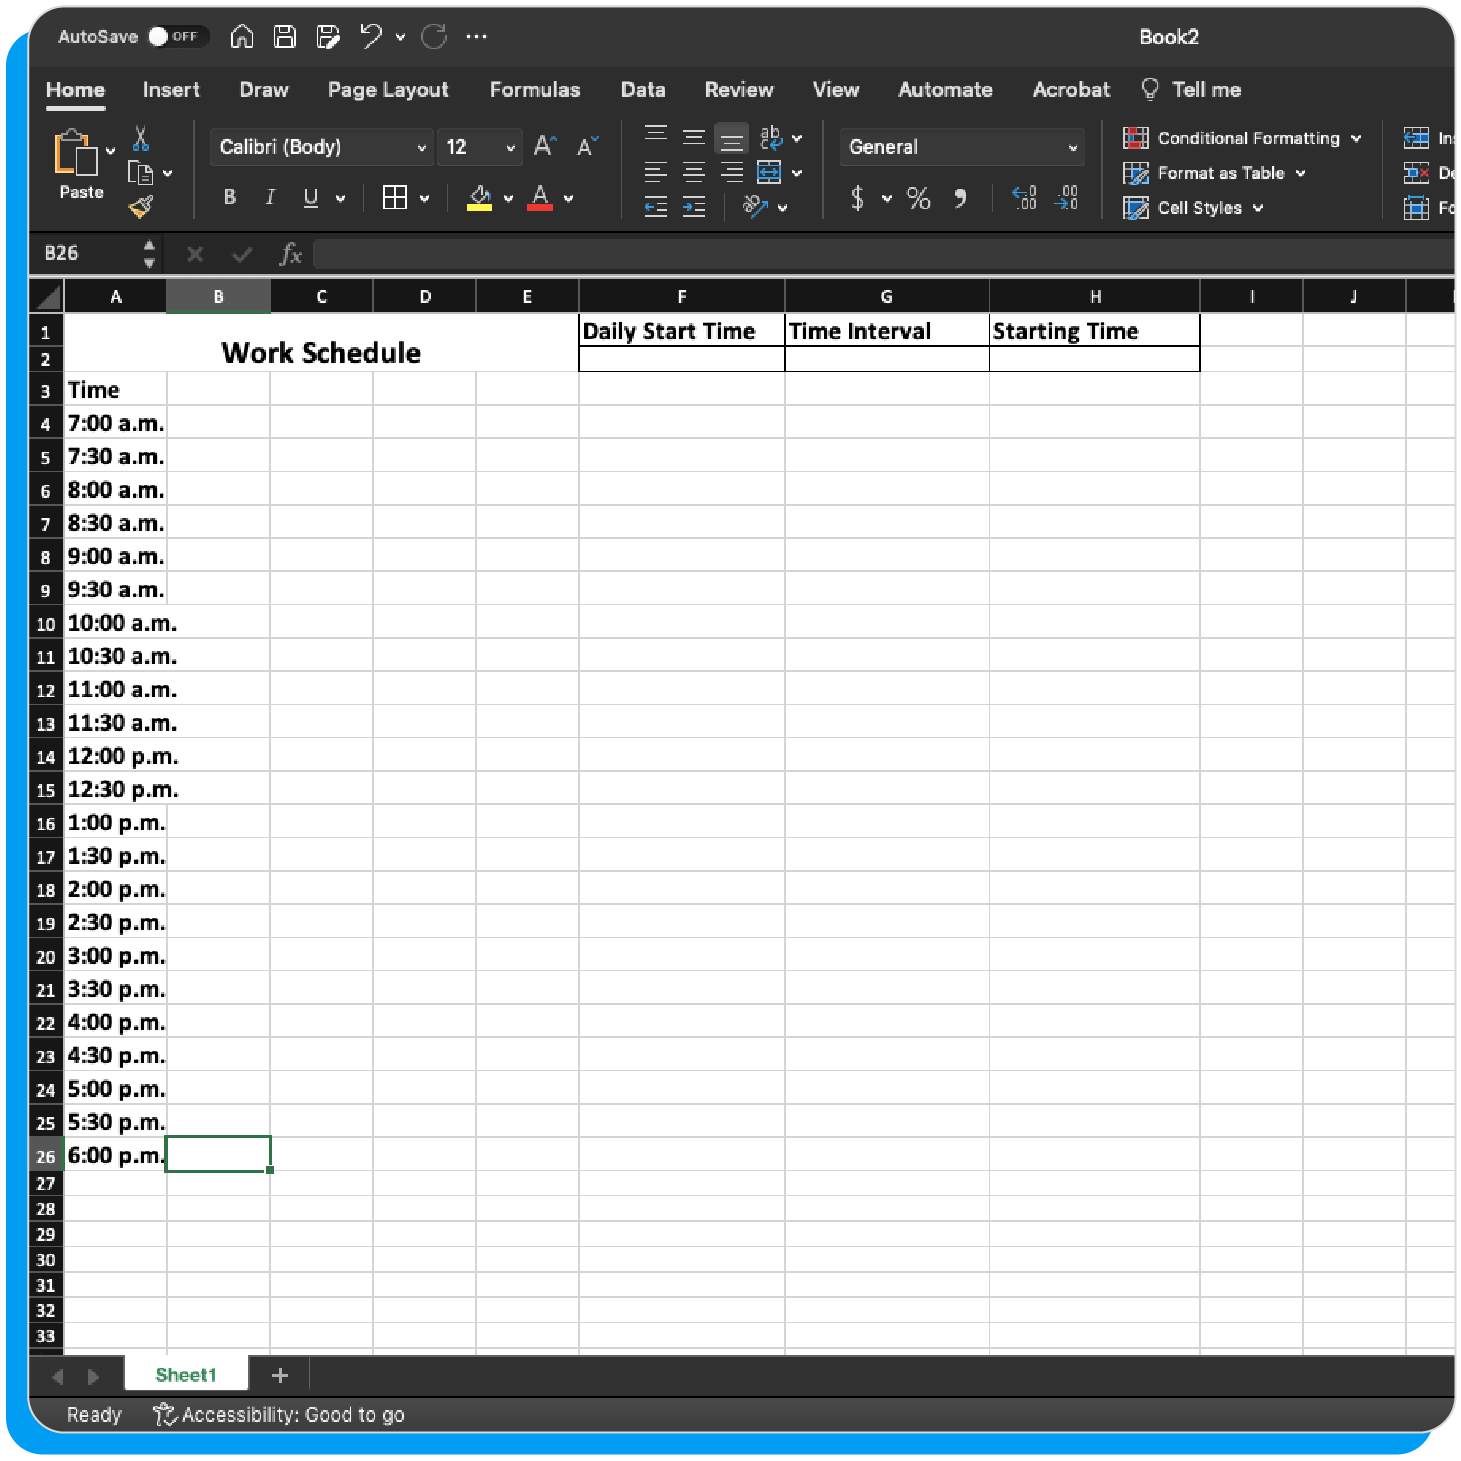
8. From cells B3:H3, enter the days of the week. Begin with whichever day works best for your work schedule.
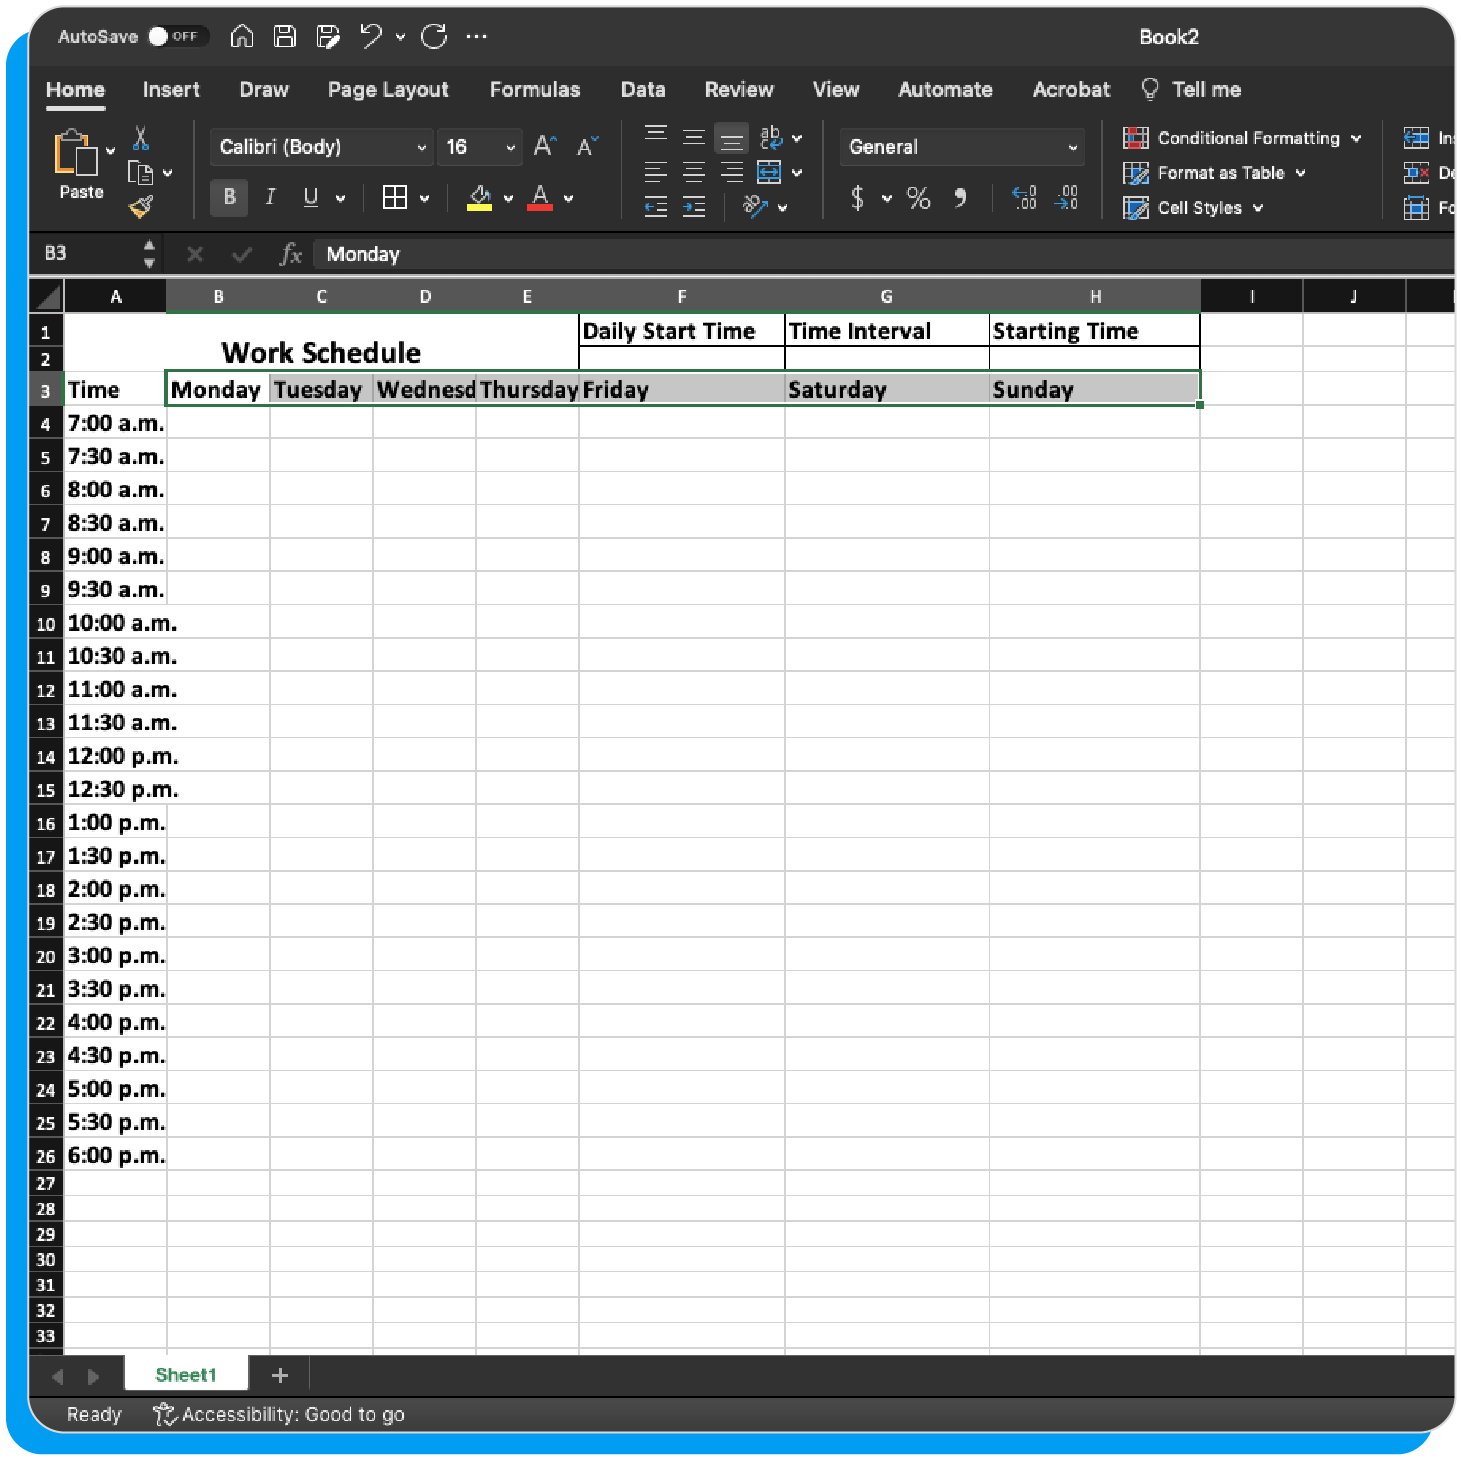
9. Select all cells and center-align text. Then adjust cells to fit the text.
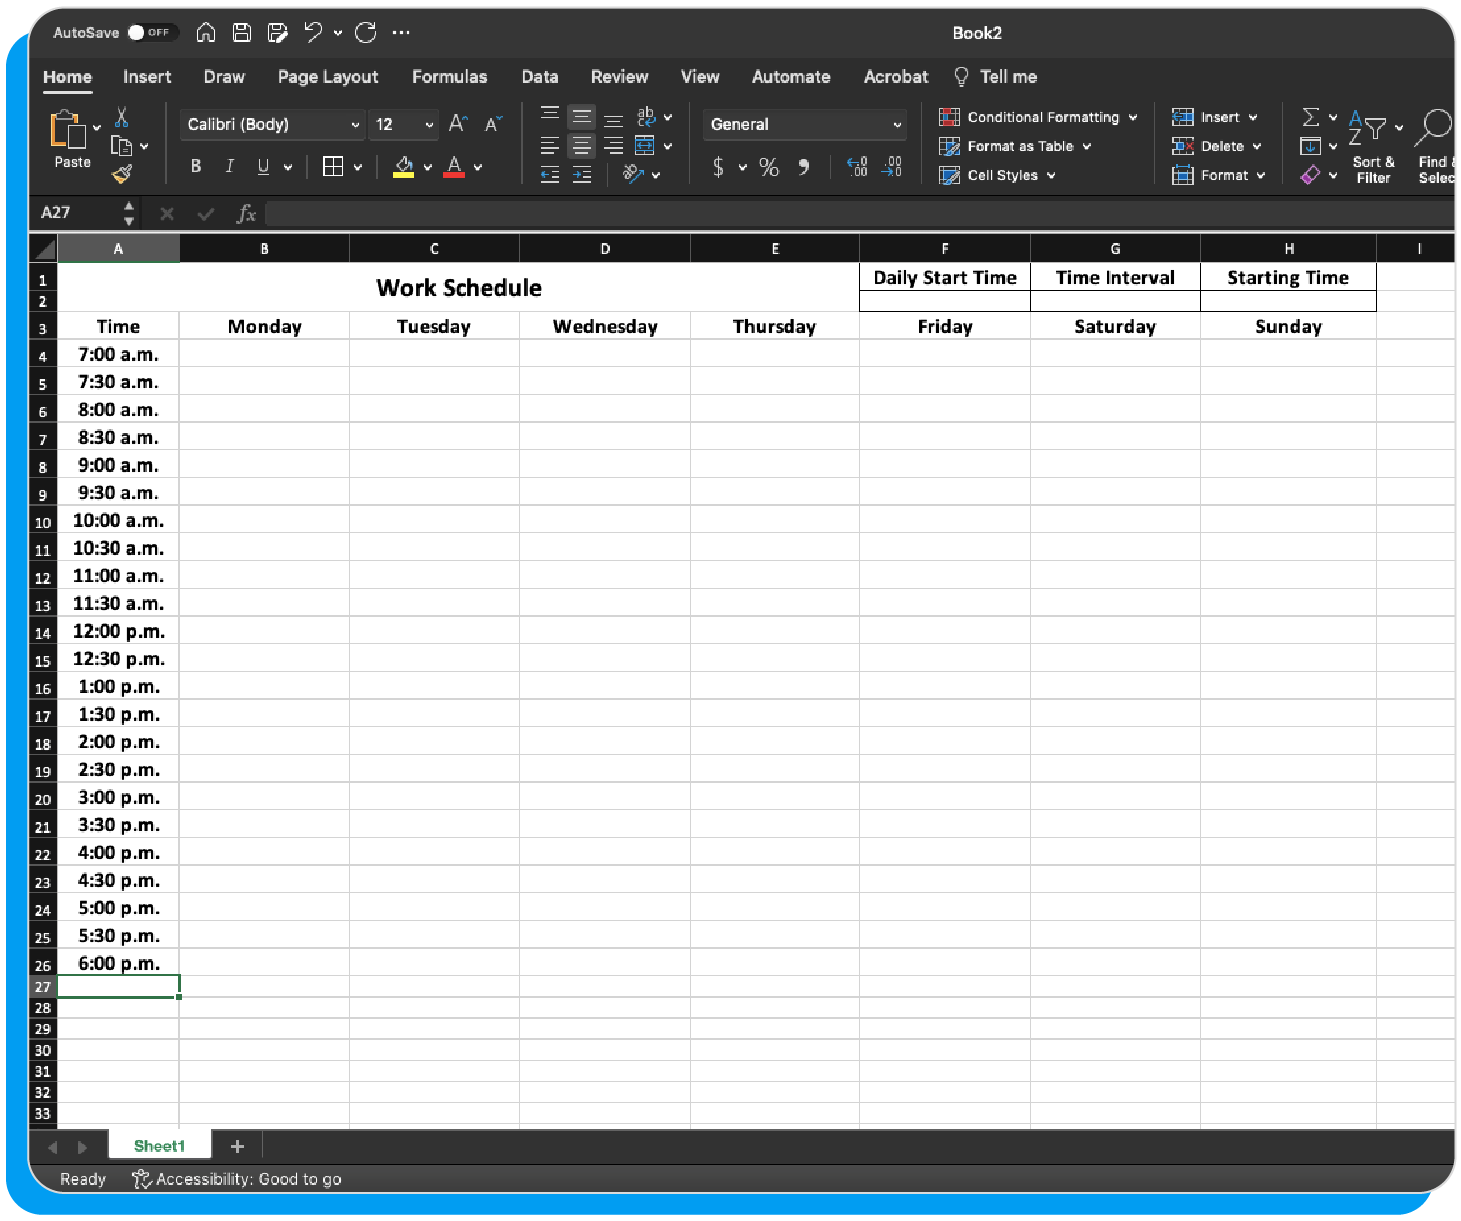
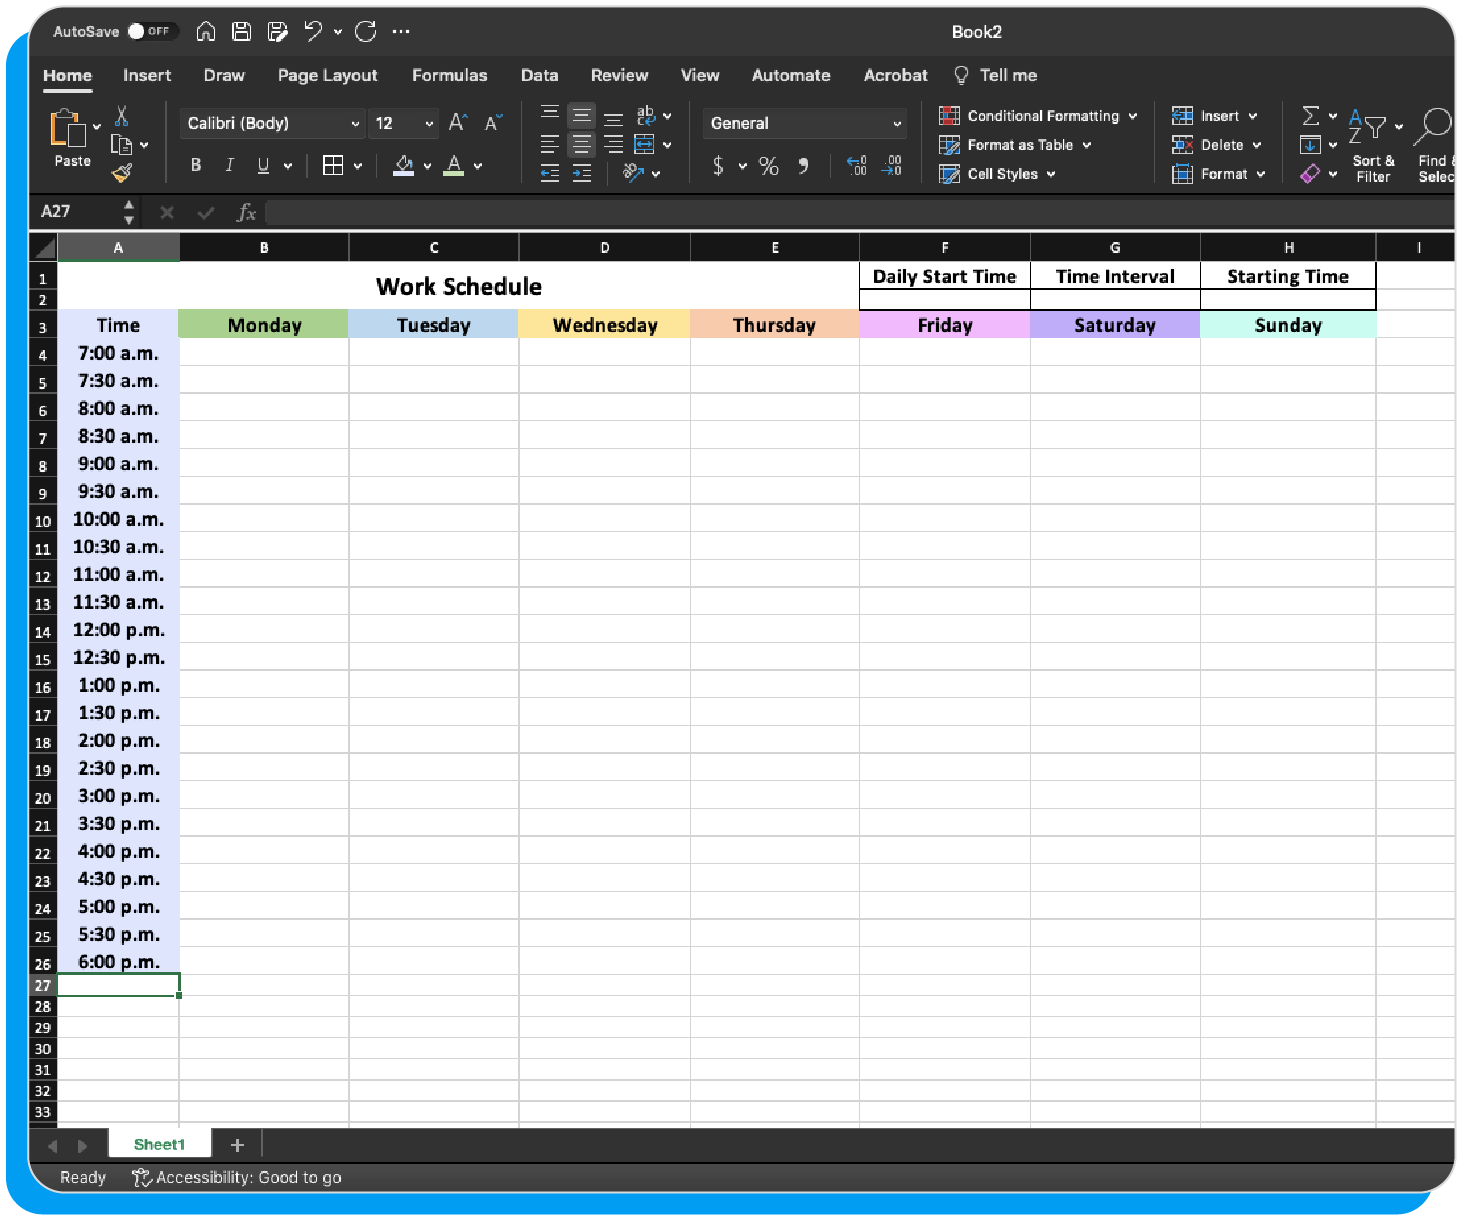
10. Optional: Color code times and days of the week. Then save your schedule as a template.
After creating the base work schedule, you can fill in the days and times with project tasks, assignments, meetings, and other necessary information.
Excel schedules: What to consider
Before diving into the ins and outs of Excel, you need to have a clear picture of what you want to achieve with your schedule. Work schedules can come in many different shapes and sizes, and each type can be used to achieve different goals.
Do you need a work schedule for your own personal work day, or are you scheduling a team of employees’ shifts across a week or two? Whatever schedule you create, focus on ease of use. You should be able to glance at a work schedule and almost immediately know who needs to be where at what time, quickly track hours for payroll, and view current and upcoming project steps.
Benefits of Excel scheduling
Whether you’re a large business or an individual, scheduling is vitally important. You want to get the most out of your resources by maximizing your use of time — both the amount and the quality of time spent working. In addition to helping you plan out working days, Excel scheduling makes a big difference by helping:
- Lower costs: For many teams, Excel is one of the most affordable scheduling options. Excel is often available in public workspaces like libraries and is downloaded onto professional computers or access is provided by an organization.
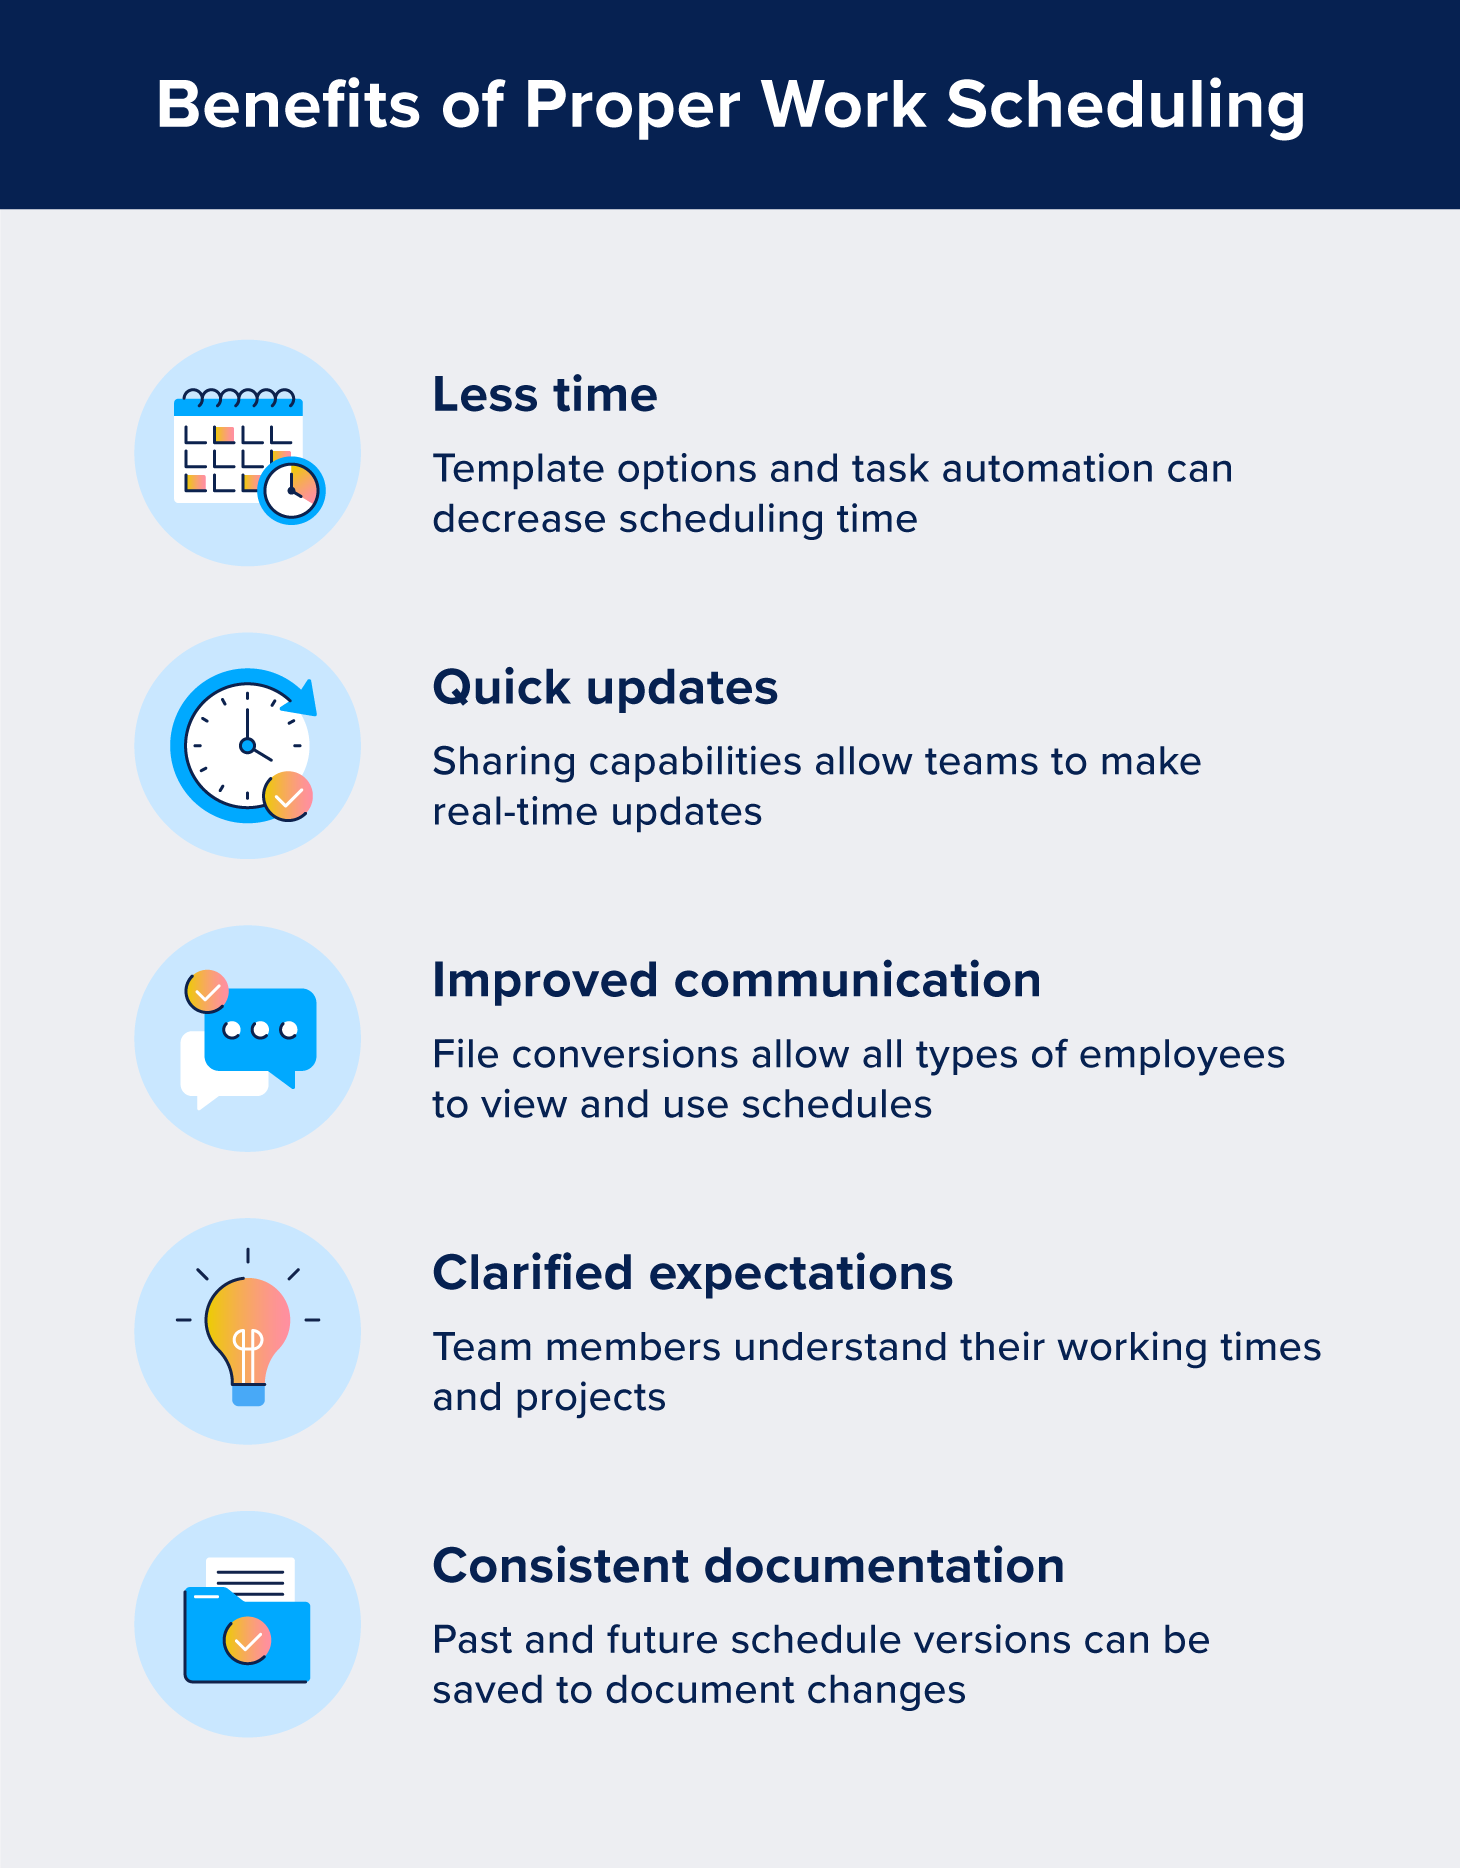
- Save time: Work schedules in Excel can be created into reusable templates, which can help teams save time when they need to remake schedules. Plus, Excel’s high-level features can help automate and organize various tasks.
- Speed up updates: By being able to save multiple templates or versions of a work schedule, teams can quickly create work schedules in Excel. Plus, Excel’s sharing capabilities allow team members to make real-time updates to schedules.
- Improve communication: Excel files can be converted to other formats, shared digitally, printed, and more — keeping team members of all types up-to-date on work-specific information, including last-minute changes or shifts.
- Create consistent documentation: Instead of rewriting a schedule file, users can choose to save a new version of their work schedule when making changes. This automatically documents when changes are made, by whom, and what was updated.
Is it time to upgrade your software?
Scheduling might seem like a small detail, but learning how to make a work schedule in Excel — or any other work management system — can be incredibly important for business success. Scheduling your staff at the right time helps your business run smoothly, increases morale, and decreases the possibility of overworking or underpaying staff, so it pays to get your scheduling right.
No matter what type of work schedule you need to create, using scheduling software like ZoomShift can help take the stress out of scheduling and make sure you get it right week after week. Take advantage of your 14-day free trial today and see how we can help transform your scheduling.
JD enjoys teaching people how to use ZoomShift to save time spent on scheduling. He’s curious, likes learning new things everyday and playing the guitar (although it’s a work in progress).